For our 3D printing service, we rely on 3D printing processes using stereolithography from Admatec. This allows complex geometries made of ceramic to be produced economically.
3D printing process
We use a suspension liquid consisting of a light-sensitive resin and the ceramic powder as the starting material. As is now common in plastic 3D printing, a UV light source in the form of DLP (Digital Light Processing) is used to cure the resin selectively. Layer by layer, the green part is created, as it is called in technical jargon. At this point, the 3D-printed component is a composite in which the ceramic particles are embedded in a light-cured plastic. The composite only becomes a dense ceramic material during the subsequent thermal treatment. In the first step, the plastic is baked out by slow heating and then sintered at over 1600 °C. Only then is the component given the final properties of high-performance ceramics. Only then does the component acquire the final properties of high-performance ceramics.
Features and benefits
Freedom of geometry and fine structures thanks to stereolithography
High-purity materials Aluminum oxide 99.9 % and zirconium oxide
Resolution X, Y: 40 µm effective
Resolution Z due to layer thickness 15-40 µm
sealed parts - no open porosity, 99.4 % TD
mechanical strength almost as with pressed or milled parts
Surface quality of Ra = 0.6 - 1.2 µm without post-processing, significantly better with post-treatment
Repeatability
Wall thickness between 1/64″ and 3/8″ or 0.3 and 10 mm
Economically scalable process -> not only suitable for prototyping and academia
Technical challenges in ceramic 3D printing
Ceramic-compatible design
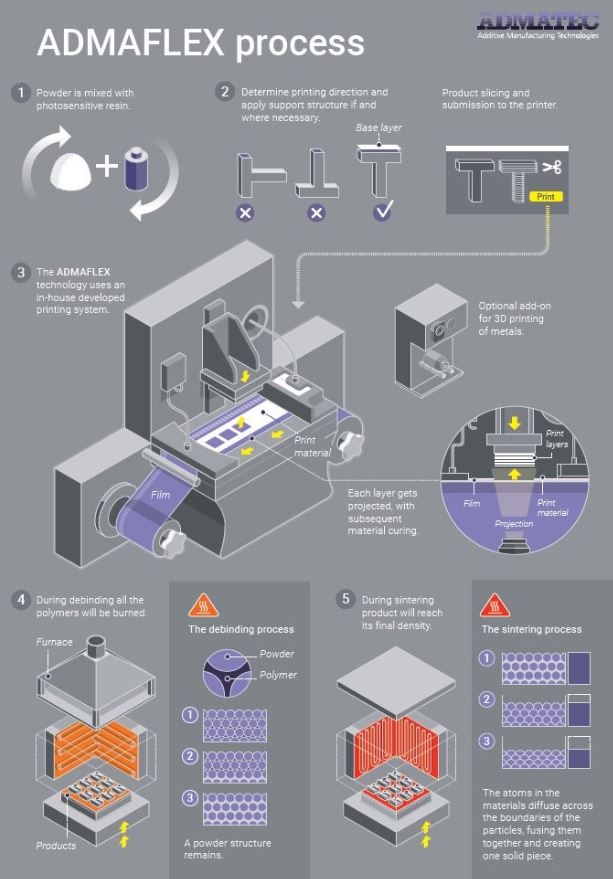
Ceramics differ from other materials due to the downstream sintering process during production. Sintering gives the ceramic component its final properties and shrinks up to 30 %. Ceramic-compatible design ensures that the intrinsic stresses occurring during sintering are reduced, evenly distributed or, for example, cancel each other out due to the symmetry of the component.
A small excerpt of such rules would be:
Avoid large cross-sectional jumps (Stress Reduction)
Round off cross-section jumps with radii (Stress Distribution)
Symmetry (Stress Cancelation)
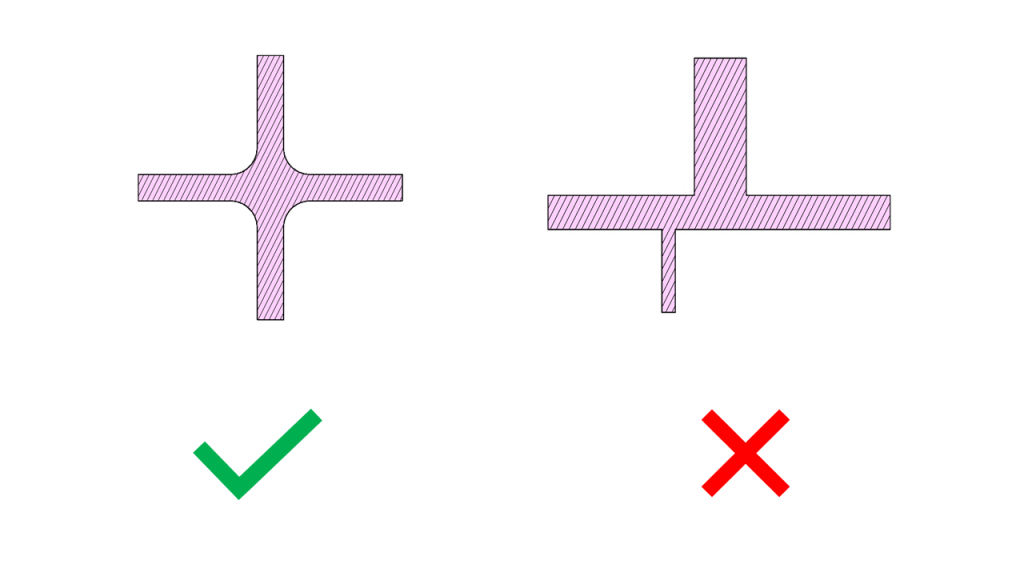
3D print-compatible design
Our 3D printing technology using stereolithography offers immense freedom in the geometric design of components.
It is essential to bear this in mind:
Bonding box: 2 15/16″ x 1 5/8″ x 3 3/16″ or 74 x 41 x 80 mm
ideally a flat starting surface, which serves as the starting surface for the component that is created layer by layer.
Wall thickness should range between 0.3 and 10 mm lie
Avoid free overhangs, as the part must be supported by support structures during printing. These are removed before sintering and roughen the surface slightly
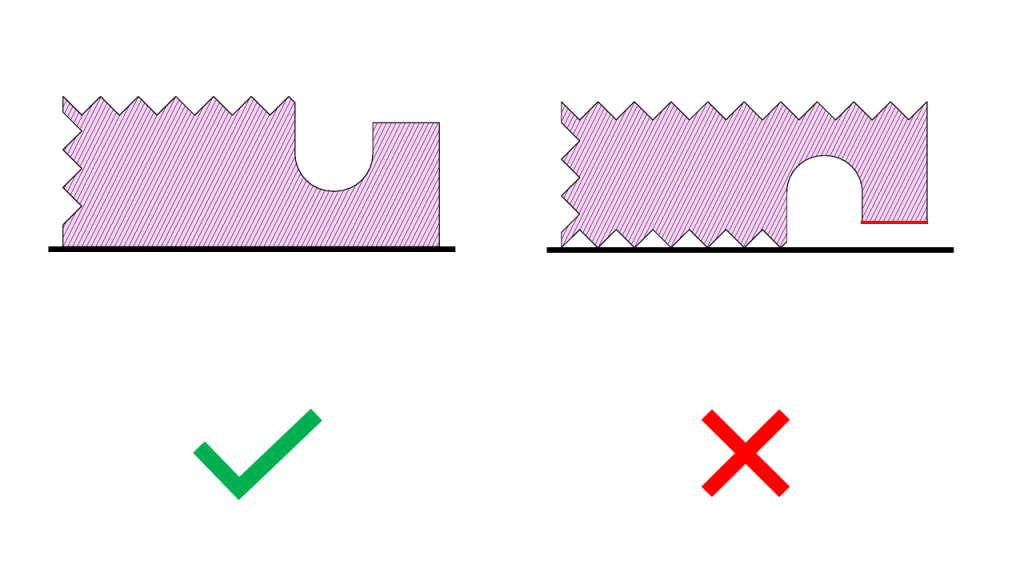
Post-process fair construction
After 3D printing, the components must be cleaned of the suspension fluid.
It is recommended:
ensure that the diameter of channels and holes is not smaller than 1/50″–1/25″ or 0.5-1 mm
all structures must be accessible from the outside, i.e. No enclosed cavities